Load testing is like taking your application to the gym - it helps you build up its strength and endurance so it can handle any amount of traffic you throw at it. Just like how a personal trainer helps you identify weaknesses in your body, load testing helps you spot performance issues and bottlenecks in your application. So, grab your sweatbands and protein powder, because in this article we'll be pumping some iron with NestJS and k6, a powerful open-source load testing tool.
What is k6?
k6 is like the ninja warrior of load testing tools - it's fast, agile, and ready to take on any challenge. Designed with developers in mind, k6 is the perfect sidekick for NestJS when it comes to load testing. With its easy-to-use API and scalable architecture, k6 makes it a breeze to create complex load tests and analyze the results. And just like a good workout buddy, k6 is always there to help you integrate your load testing into your CI/CD pipeline. So, grab your throwing stars and get ready to unleash the power of k6 on your NestJS app.
How to set up k6 and NestJS
Before you start pumping iron with NestJS and k6, you need to set the stage for this workout. Think of it like setting up a gym - you need the right equipment and surroundings to make sure the gains keep coming. Here's your checklist:
Install k6 on your local machine - it's like the dumbbell in your gym bag. You can download k6 from the official website: https://k6.io/docs/getting-started/installation
Create a new NestJS app or use an existing one - think of it like picking your favorite exercise: https://docs.nestjs.com/first-steps
Install the k6 module for NestJS - it's like setting up your weights on the bench. With everything in the right place, you'll be ready to pump some serious traffic through your app:
npm install --save k6Create a new folder named
testin your NestJS app - think of it like your locker room.Create a new file named
loadtest.spec.tsin thetestfolder - think of it like your workout plan.Copy the following code into the
loadtest.spec.tsfile:import http from 'k6/http'; import { sleep } from 'k6'; export default function () { const res = http.get('http://localhost:3000') sleep(1) }This code will send a GET request to your
NestJSapplication every second. You can modify the URL to point to a specific endpoint or route in your application.Start your NestJS application by running the following command in your terminal:
npm run startOpen a new terminal window and navigate to the
testfolder.Run the following command to start the load test:
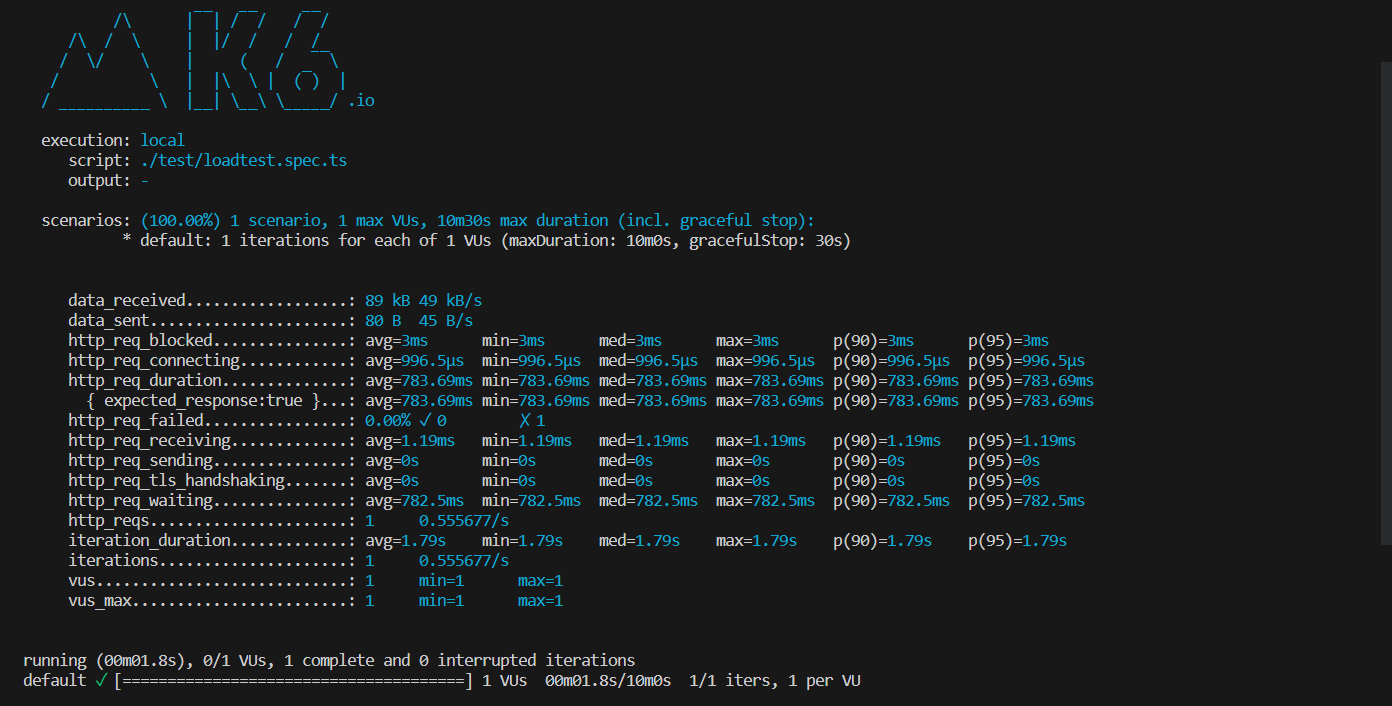
k6 run loadtest.spec.ts
This will start the load test and output the results to the terminal.
Load testing options in k6
K6 is like a Swiss Army knife for load testing - it's got all the tools you need to customize your tests like a pro. Here are some of the most commonly used options:
VUs (Virtual Users): Like virtual workout partners, you can specify the number of VUs and generate unique data for each user. You can use the
__VUand__ITERvariables to generate unique user data for each virtual user.Duration: Like setting a timer on your workout, you can specify the duration of the.
Stages: Like setting up different exercise sets, you can specify different stages with different levels of concurrency, ramp-up time, and duration.
Thresholds: Like setting personal records, you can set performance thresholds for metrics like response time, error rate, and throughput.
Tags: Like labeling your gym gear, you can attach custom metadata to your results with tags. Use them to group and filter your results like a pro.
Here's an example of a load test that uses these options:
import http from 'k6/http';
import { check, sleep } from 'k6';

export const options = {
  vus: 10,
  // duration: '30s',
  thresholds: {
    http_req_duration: ['p(95)<1500'],
  },
  tags: {
    environment: 'production',
  },
  stages: [
    { duration: '10s', target: 100 },
    { duration: '20s', target: 200 },
  ],
};

export default function () {
  const res = http.post(
    'http://localhost:3000/user',
    JSON.stringify({
      name: `User ${__VU}-${__ITER}`,
      email: `user${__VU}-${__ITER}@gmail.com`,
      password: 'password',
    }),
    { headers: { 'Content-Type': 'application/json' } },
  );
  check(res, { 'Status was 201: ': (r) => [200, 201].includes(r.status) });
  sleep(1);
}
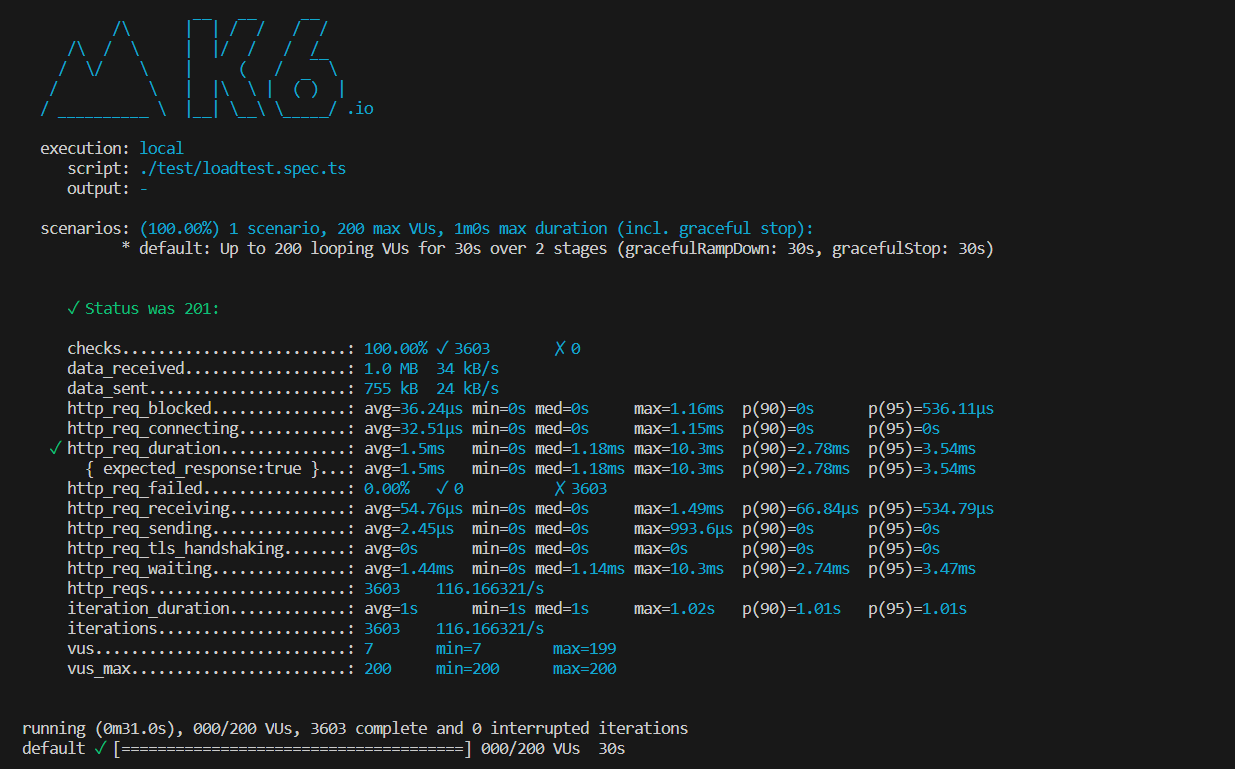
You'll have 10 virtual users throwing POST requests at the "/users" endpoint, with the number of concurrent users gradually increasing to 200 over 20 seconds. By setting the threshold to http_req_duration: ['p(95)<1500'], we are establishing that for our load test to be successful, 95% of HTTP requests must be completed in less than 1.5 seconds. It'll even add a custom tag to the results to show that it's the real deal - just like a champ fighting in a pro production environment.
Conclusion
Load testing is essential for ensuring the performance and scalability of your NestJS application. With k6, you can easily conduct sophisticated load tests and analyze the results to optimize your application. By utilizing the various options available in k6, you can fine-tune your tests to replicate real-world scenarios and identify potential performance issues. I hope this article has provided you with a helpful starting point for load testing in NestJS using k6.
The repository with the test code is here: https://github.com/mike-yuen/k6-nestjs